What Is a Whetstone
A whetstone (Polish: kamień do ostrzenia or osełka) is an abrasive block used to grind and refine a blade edge. The abrasive material is bonded into a rectangular or oval shape; during use, microscopic particles of the stone abrade the steel, cutting a new bevel or refreshing an existing one.
The word “whet” comes from the Old English hwettan, meaning to sharpen, and has no etymological connection to water despite the common practice of wetting some stone types before use.
Main Stone Materials
Synthetic aluminium oxide stones (corundum) are the most common type sold in Polish hardware chains. They are durable, consistent in grit, and inexpensive. Silicon carbide stones cut faster but wear more quickly. Natural stones such as Belgian coticule or Arkansas novaculite are available through specialist suppliers and produce a finer edge, but they require experience to use correctly.
Grit Selection
Grit number indicates abrasive particle size: lower numbers mean coarser particles and faster metal removal. The appropriate starting grit depends on the condition of the blade.
| Grit Range | Type | When to Use |
|---|---|---|
| 120–400 | Coarse | Chipped or heavily dulled edge; reprofiling the bevel |
| 600–1000 | Medium | Moderately dull knife with an intact bevel |
| 2000–3000 | Fine | Refining after medium stone; routine touch-up |
| 4000–8000 | Polish | Final edge polish; removing micro-scratches from the bevel |
A double-sided 1000/3000 stone covers most kitchen knife situations and is the standard starting purchase for home use. Combination stones in this range are sold under the Giesser, Dick, and Lansky brands in Polish kitchenware stores, as well as locally made options from Fiskars.
Preparation
Soaking and Lubricating
Most synthetic aluminium oxide and silicon carbide stones require soaking in water for 5 to 10 minutes before use. The stone should visibly stop releasing air bubbles before you begin. Some stones require only a splash of water on the surface during sharpening rather than full immersion; check the manufacturer label.
Natural oil stones (Arkansas, Indian) are used with a thin layer of honing oil rather than water. Mixing lubricant types can clog stone pores over time. Keep one type of lubricant per stone.
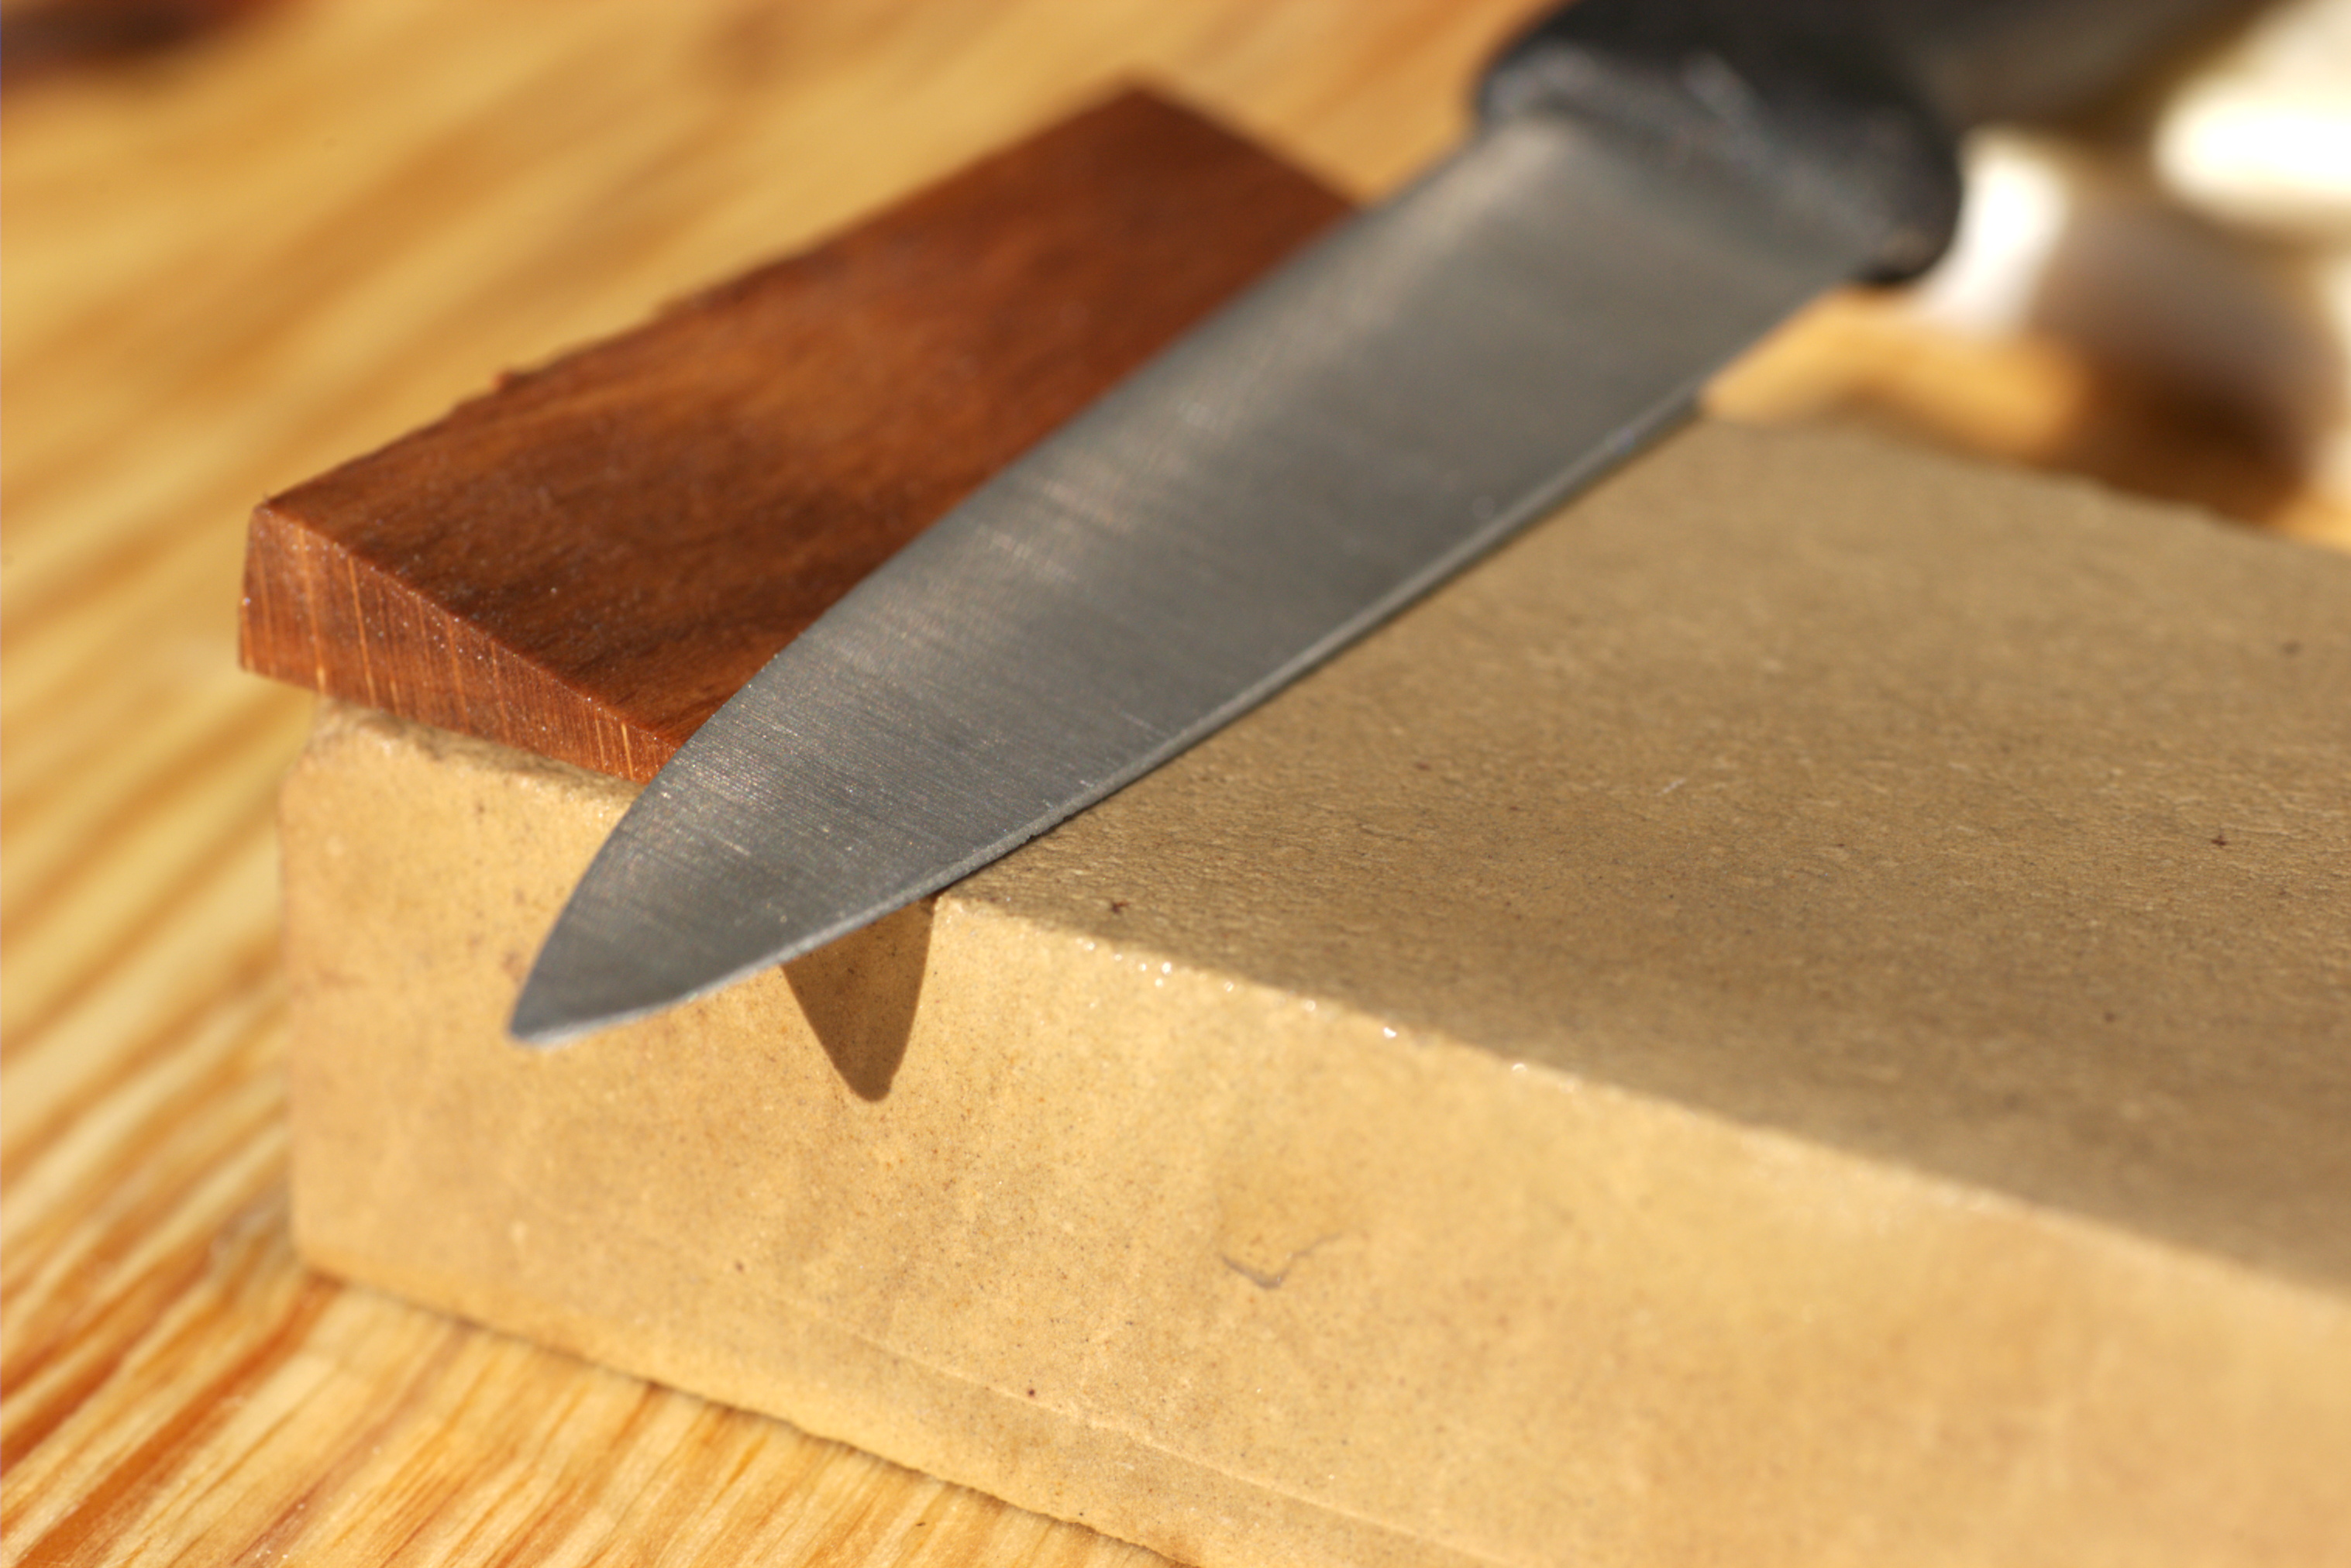
Securing the Stone
Place the stone on a damp cloth or rubber mat to prevent it from sliding. Many stones come with a plastic base. Working on a stable surface at counter height reduces hand fatigue and improves angle consistency.
Sharpening Technique
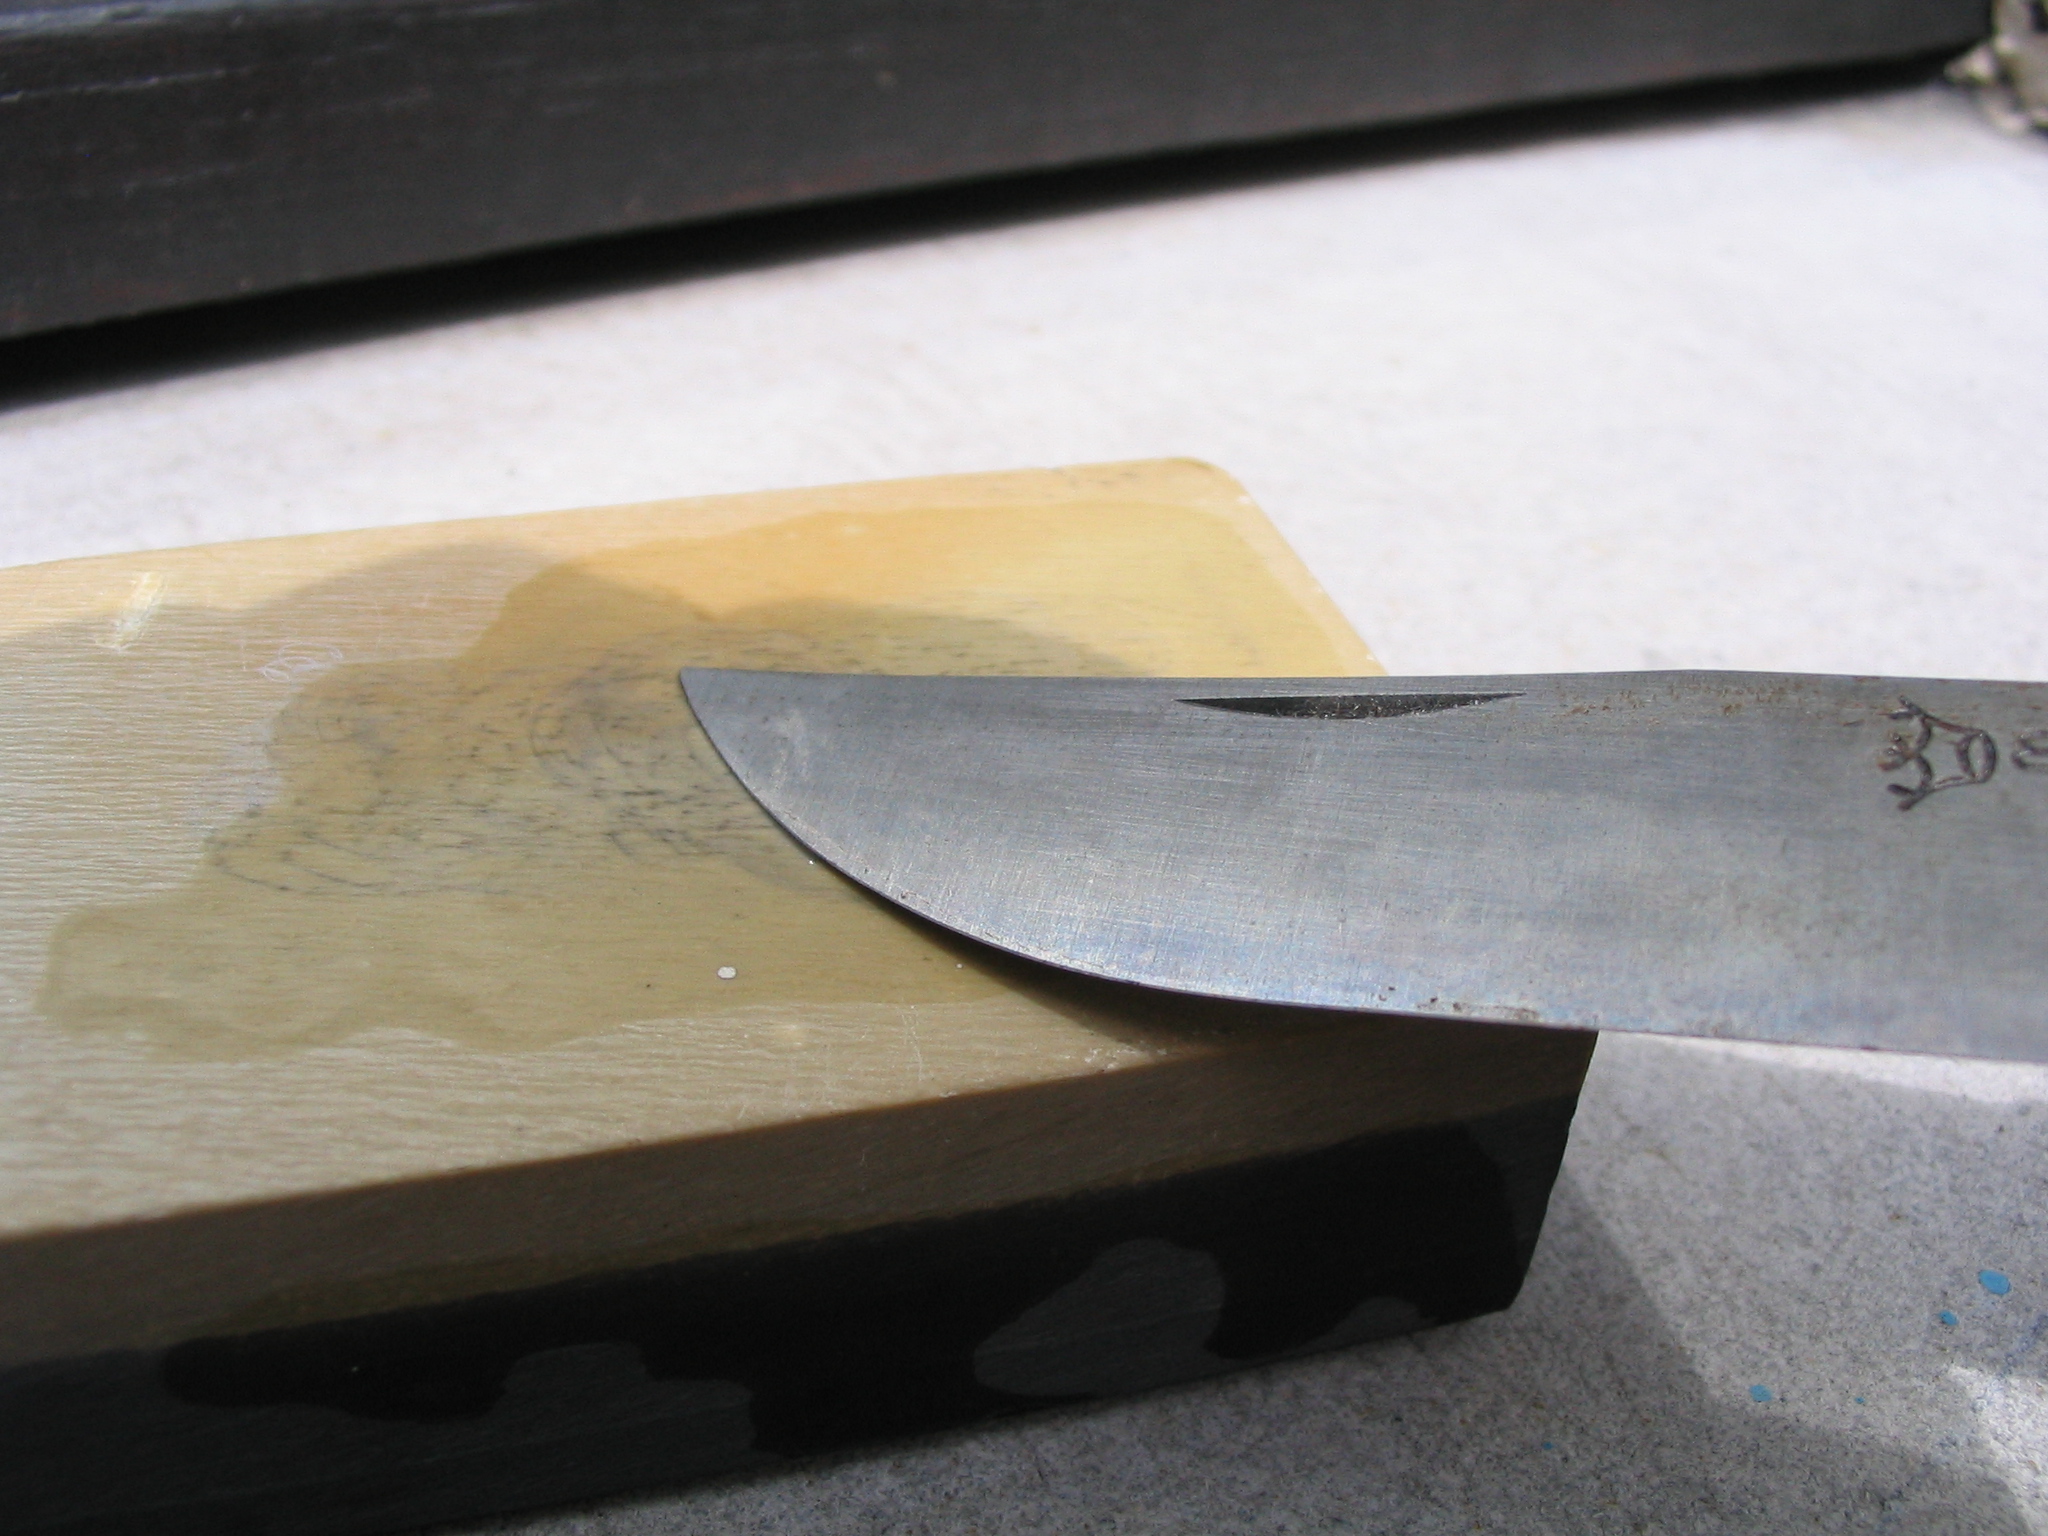
Establishing the Angle
Hold the knife with your dominant hand on the handle. Place the blade flat on the stone, then raise the spine until the bevel face rests fully on the stone surface. For a typical European chef’s knife, this is approximately 15–20 degrees per side; for Japanese knives, 10–15 degrees. A simple way to gauge 15 degrees is to hold two stacked business cards under the spine.
Stroke Direction and Pressure
Push the knife forward along the stone with light, even pressure, moving from heel to tip in a single arc that follows the curve of the blade. The edge trails the spine during the forward stroke. Return the blade by lifting and repositioning, or by drawing it back with reduced pressure depending on personal technique.
Apply moderate pressure on the first few strokes to begin removing metal, then reduce pressure progressively as the edge forms. Heavy pressure does not speed up the process and can produce an uneven bevel.
Counting Strokes
Work one side of the blade for 5 to 10 strokes, then switch to the other side for an equal number. Continuing with equal alternating sets until a consistent burr forms along the entire length of the edge. The burr is a thin wire of metal folded over to the opposite side; it is felt by dragging a thumb perpendicular (not parallel) to the edge.
Removing the Burr
Once a burr is present, move to the next higher grit or reduce pressure and alternate one stroke per side three to five times. This breaks off the burr. Finish on a leather strop or cardboard to align remaining micro-teeth.
Finishing
A 6000 or 8000 grit stone produces a mirror-polished bevel suitable for slicing tasks. For knives used for harder foods such as root vegetables or bread, a slightly coarser finish at 2000–3000 grit retains more edge aggressiveness and may hold longer between sharpenings.
Cleaning and Storing the Stone
After use, rinse the stone under running water and scrub off the grey slurry with a stiff brush. Allow it to dry fully before storing. Storing a stone damp can cause cracking in cold conditions, particularly relevant during Polish winters where storage areas may reach below freezing.